shinestacker
Graphical User Interface
Introduction
FocusStack processes focus-bracketed images in two phases:
- Project: Batch processing (alignment/balancing/stacking)
- Retouch: Layer-based refinement
[!NOTE] Advanced processing details in main documentation.
The batch processing supports image alignment, color and luminosity balance, vignetting removal, noisy pixel masking.
Starting
- The python package can be installed from PyPI using
pip:
> pip install shinestacker
Onace installed, the GUI app can start either from a console command line :
> shinestacker
- The app can be dowloaded from the releases page:
- Windows: as installer or
ziparchive for local installation - macOS: as
dmgdisk image, where the app can be dragged to the Application folder - Linux: as
tar.gzarchive
- Windows: as installer or
The GUI has two main working areas:
- Project
- Retouch
Switching from Project to Retouch can be done from the ShineStacker main menu.
Project area
When the app starts, it proposes to create a new project.
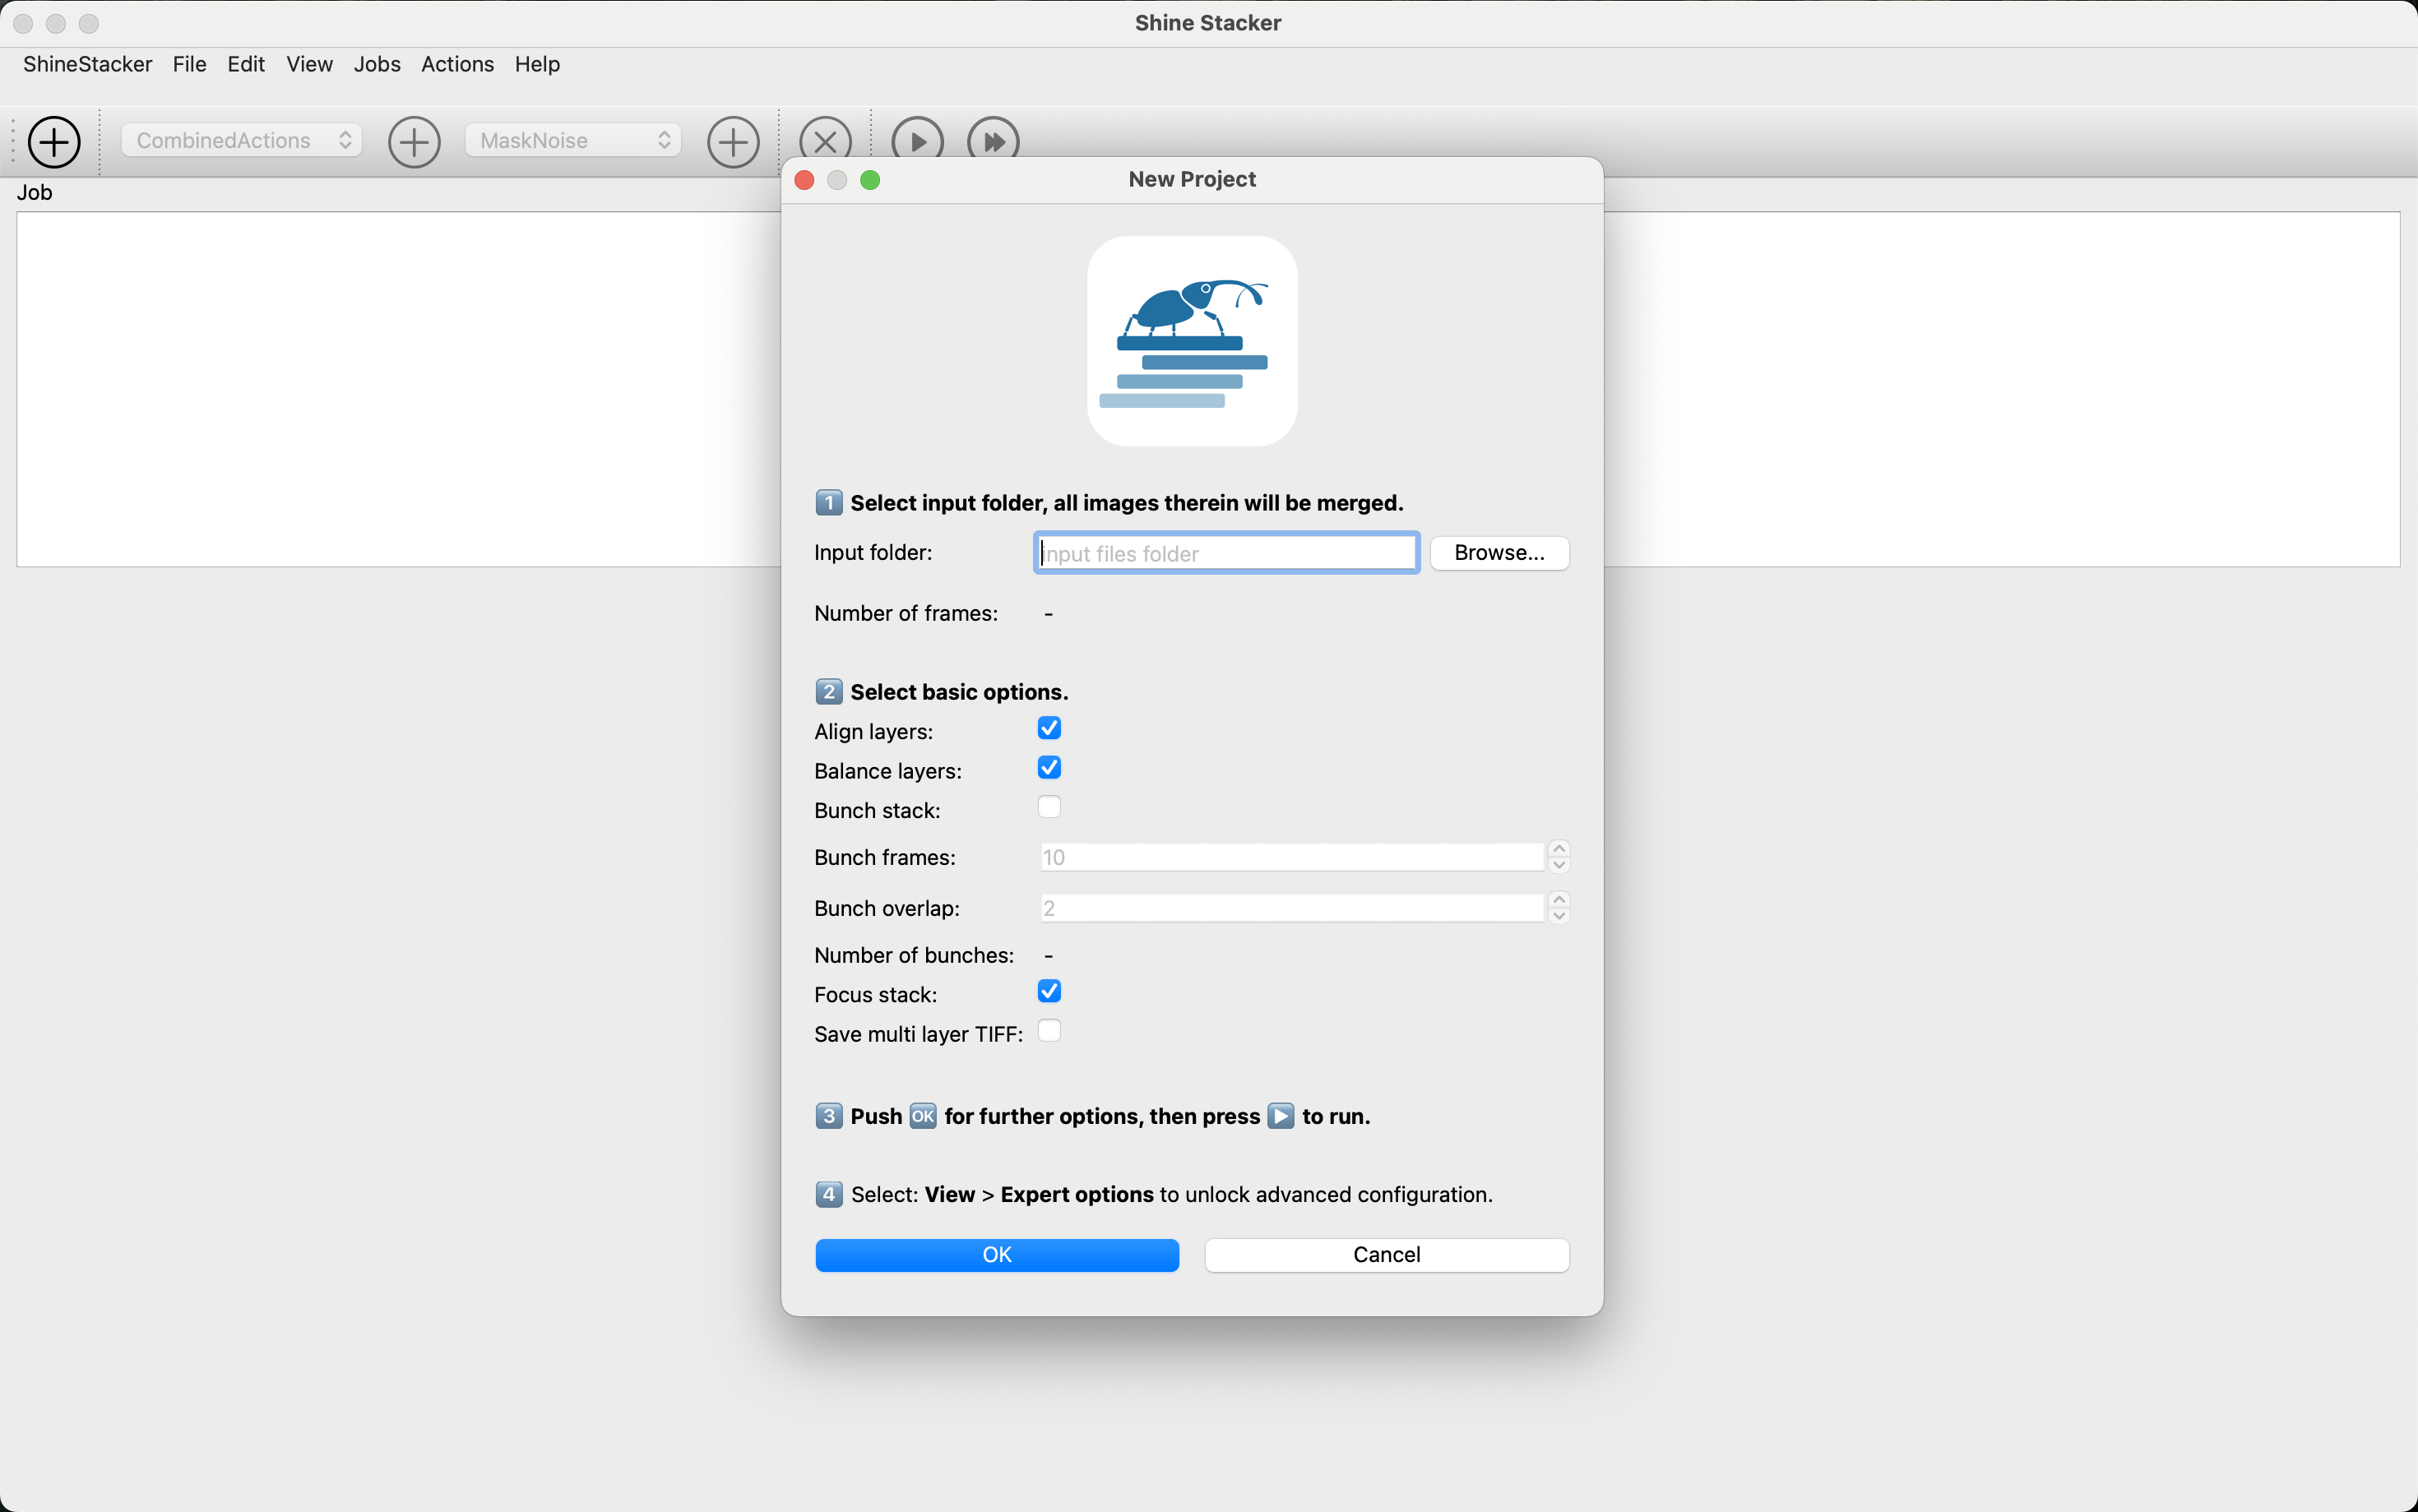
Creating Projects
- Select source folder (JPEG/TIFF 8/16-bit)
- Configure job actions (auto-saved in project file)
- Run processing:
- Real-time logs & progress bar
- Thumbnail previews for each stage

Large Set Tip: For 100+ images:
- Split into 10-15 image “bunches”
- Set number of overlapping frame from consecutive bunches
- Combine intermediate results later
The newly created project consists of a single job that contains more actions. Each action produces a folder as output that has, by default, the action’s name. Some actions can be combined in order to produce a single intermediate output (alignment, balancing, etc.).
Pro Tip: Duplicate jobs when processing similar image sets to save configuration time. You can run multiple jobs in sequence.
It is possible to run a single job, or all jobs within a project.
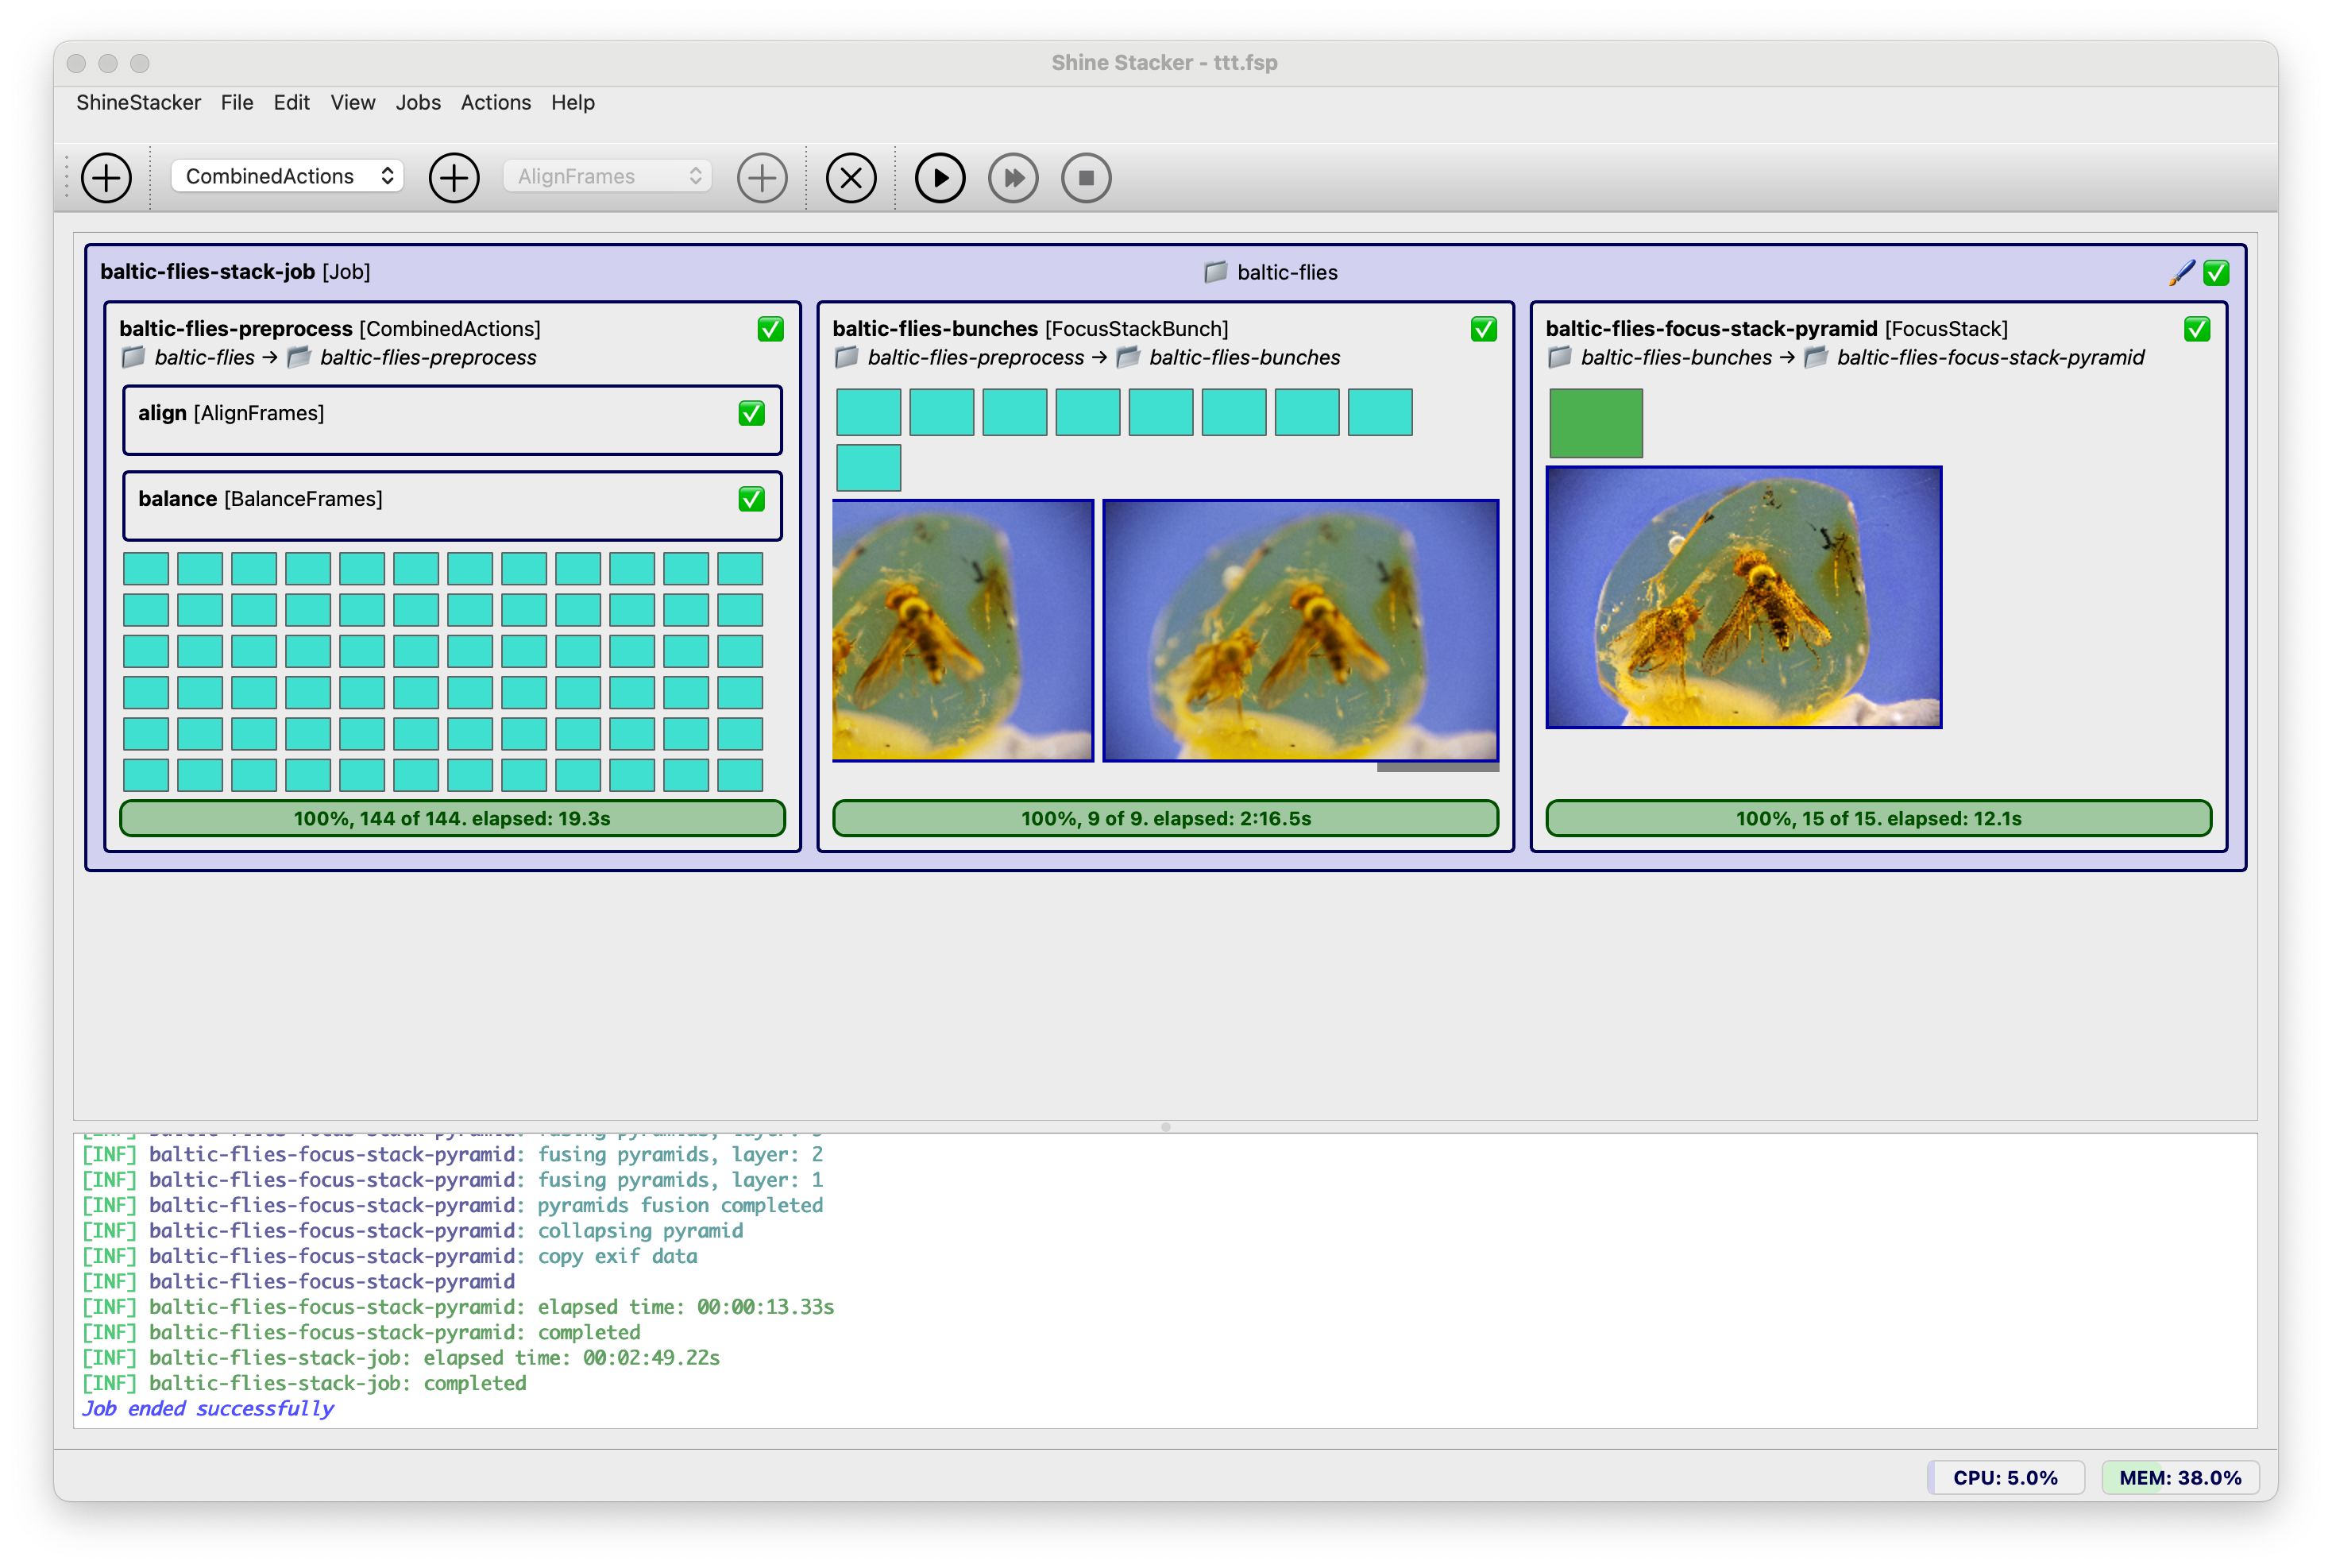
Project Run Tabs
- Job progress bar with CPU and RAM usage monitor
- Real-time log viewer
- Retouch button (enabled after processing)
When the job finishes, a Retouch button is enabled, which opens the output image into the retouch area.
Retouch area
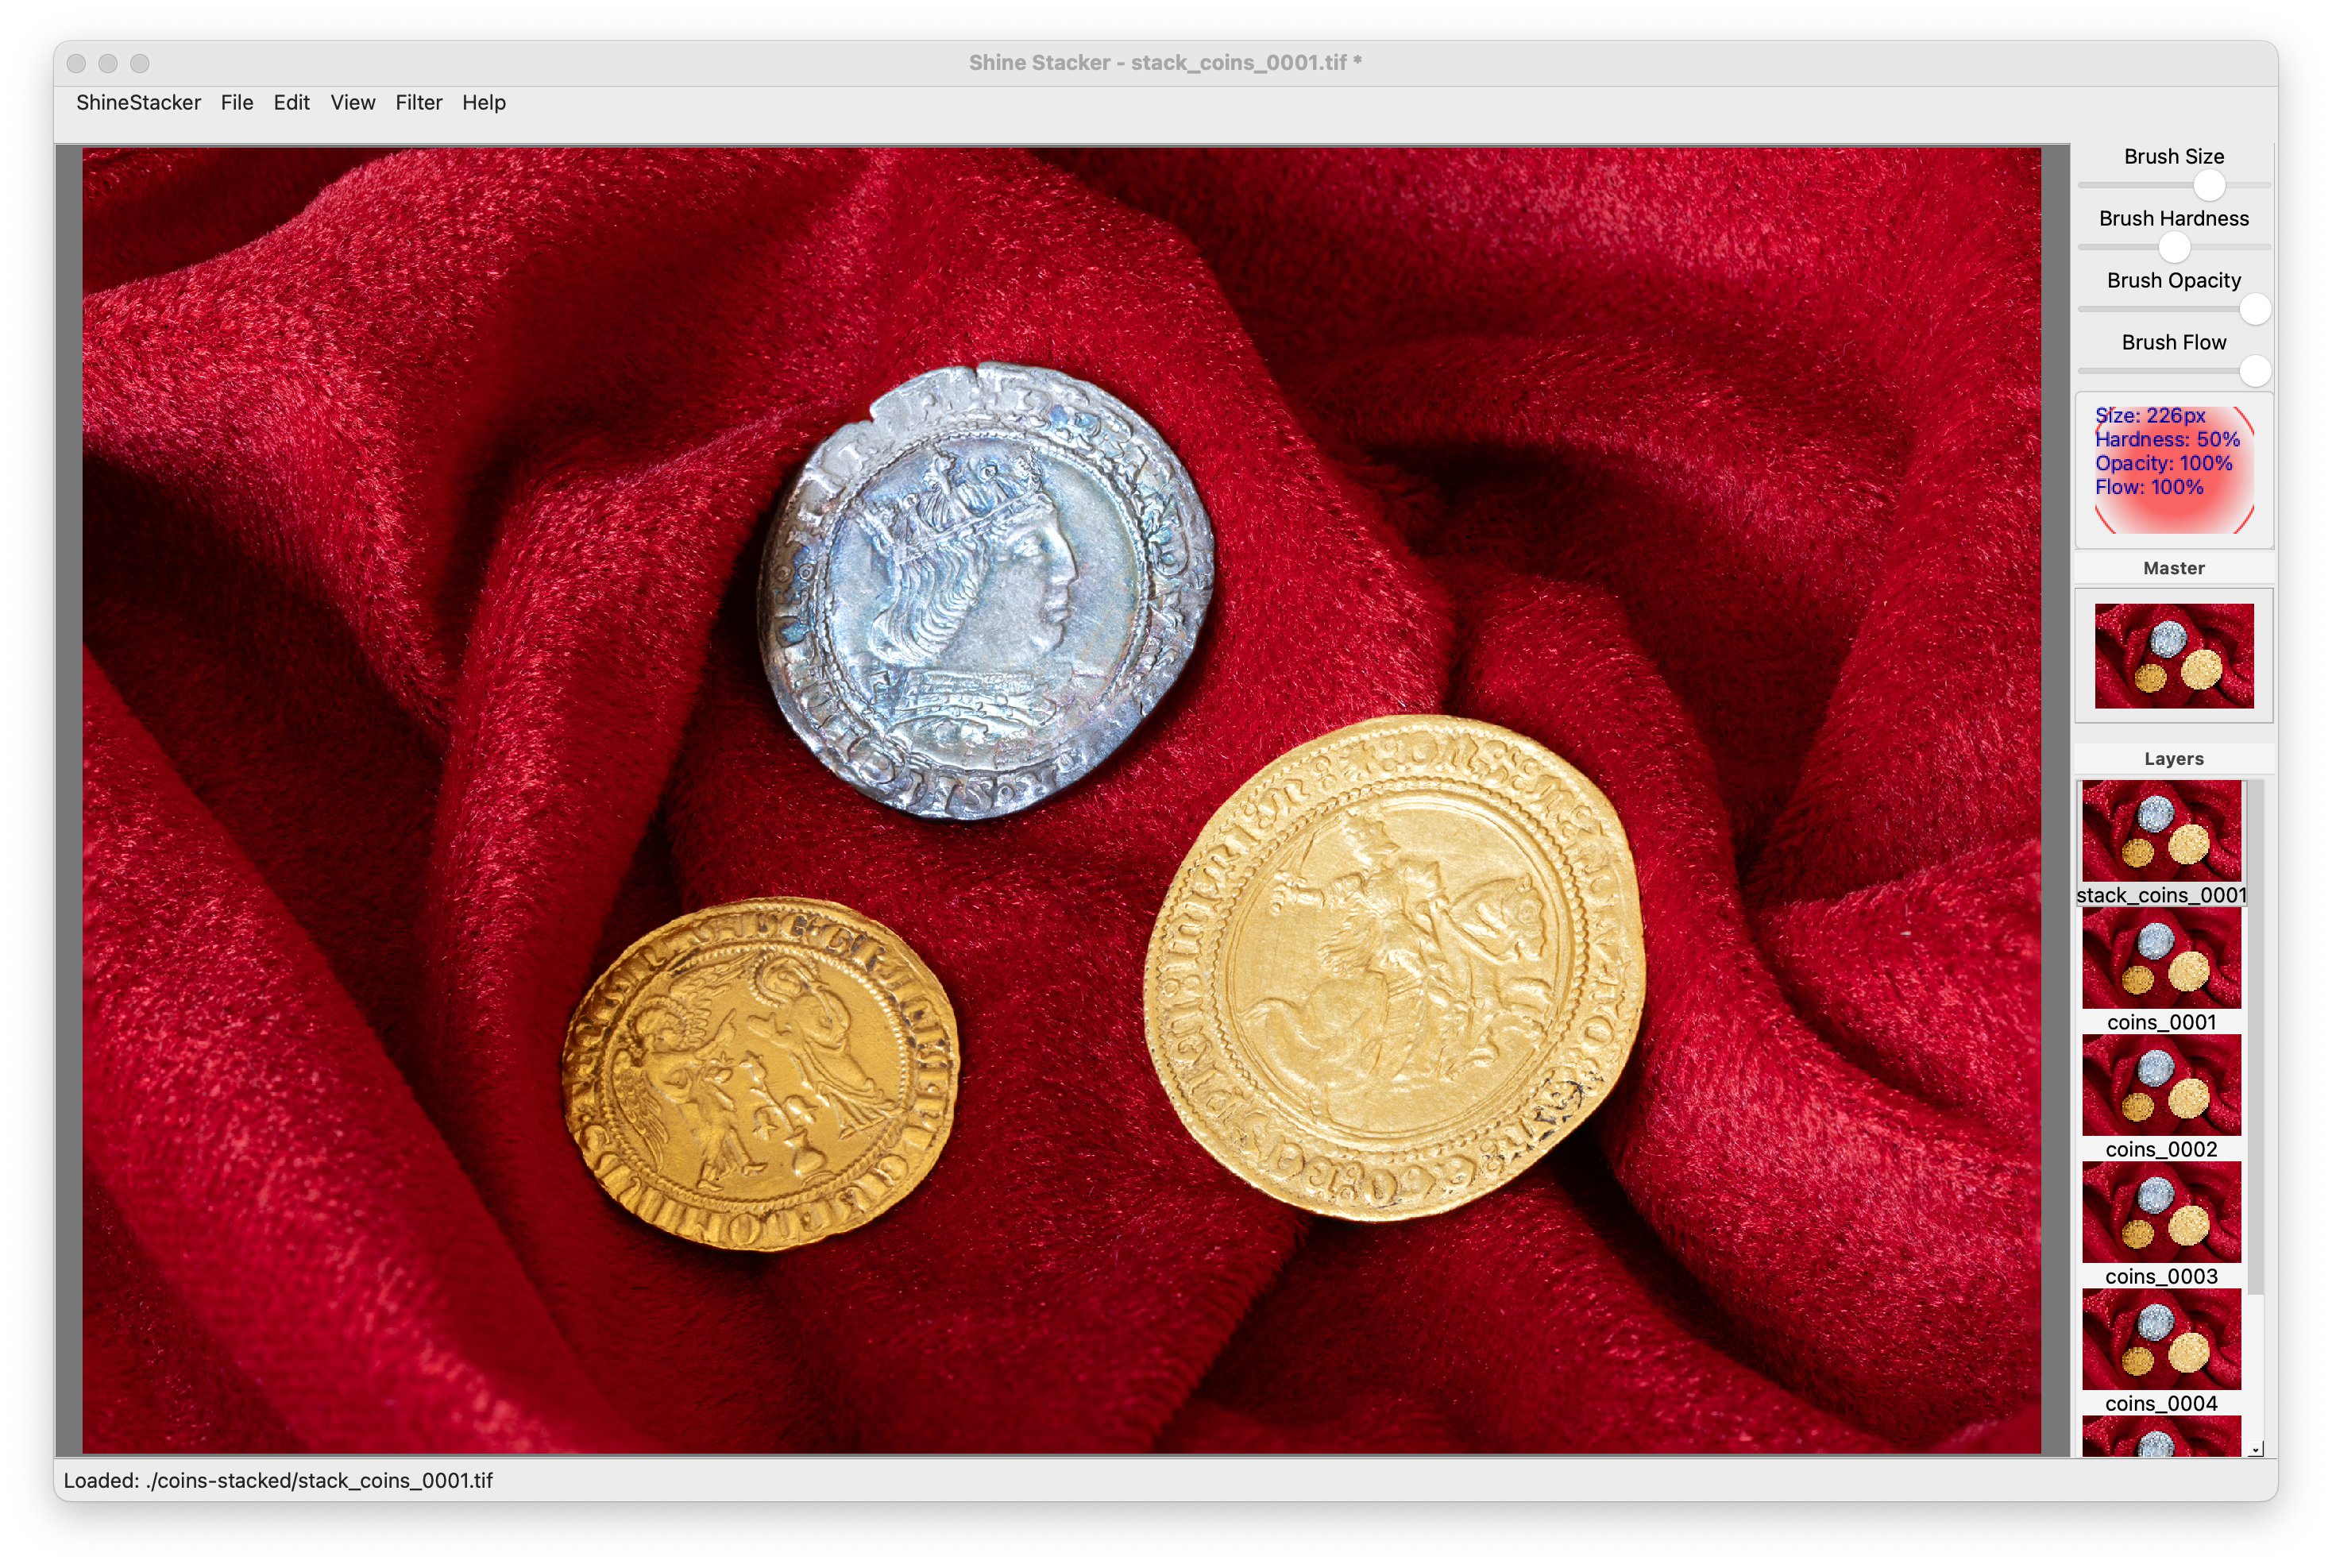
Brush Properties
Adjust in the top toolbar:
- Size: Brush diameter (px)
- Hardness: Edge softness (0-100%)
- Opacity: Paint transparency
- Flow: Paint accumulation rate
💡 Pro Tip: Use low opacity/flow (20-40%) for subtle corrections
Retouch Workflow
- Navigate:
- Zoom/pan to defect area
- Toggle between master/source (
X)
- Correct defects/artifacts:**:
- Select source layer with clean area
- Adjust brush properties (size/hardness/opacity)
- Paint over defects
- Use
Ctrl+Zto undo strokes
- Verify:
- Toggle master view (
M) to check results - Compare before/after with
L/Mtoggle
- Toggle master view (
- Filters:
- Improve the final image with sharpening, denoise and color balance
- Export:
- ✅ Final image: Single TIFF/JPEG
- 🗂️ Editable: Multilayer TIFF (large)
| Action | Shortcut |
|———————|—————————|
| Zoom in/out | Ctrl + +/- or mouse wheel or pinch on touchpad |
| Reset view | Ctrl + 0 |
| Pan | Space + mouse drag or two fingers on touchpad |
| Prev./next layer | Up/Down arrows |
| View master layer | M |
| View source layer | L |
| Toggle master ↔ layer | T |
| Temp. toggle master ↔ source | X` |
See help menu for complete list of shortcuts.
Export Formats:
- Single TIFF: Final image (highest quality)
- Single JPEG: For web and quick preview (lower quality)
- Multilayer TIFF: Preserves all layers (large file)
EXIF metadata:
- EXIF data can be imported from source images and saved with final file.